AlmaLinux9でRedmine5(5.0.5)を構築する(nginx+Unicorn+MySQL8)

Redmine5をAlmaLinux9で構築してみます。過去記事のアップデートではありますが、少し構成は変えて、nginx+Unicorn+MySQL8となっています。
目次
環境
- AlmaLinux 9.0(WebARENA Indigo)
- Redmine 5.0.5
- nginx
- Unicorn 6.1.0
- MySQL8(8.0.32)
dnf update
$ dnf -y updatefirewalld
http, httpsを許可します。
$ dnf -y install firewalld
$ systemctl start firewalld
$ systemctl enable firewalld

$ firewall-cmd --add-service=http --zone=public --permanent
$ firewall-cmd --add-service=https --zone=public --permanent
$ firewall-cmd --reload
$ firewall-cmd --list-all

-------
public (active)
  target: default
  icmp-block-inversion: no
  interfaces: eth0
  sources:
  services: cockpit dhcpv6-client http https ssh
  ports:
  protocols:
  forward: yes
  masquerade: no
  forward-ports:
  source-ports:
  icmp-blocks:
  rich rules:
-------
→http, httpsが追加されていればOK
selinuxをdisabledにする
sed -i 's/SELINUX=enforcing/SELINUX=disabled/' /etc/selinux/config
grep ^SELINUX /etc/selinux/config

-------
SELINUX=disabled
SELINUXTYPE=targeted
-------
→disabledになっていればOK
selinux更新後は、AlmaLinuxインスタンスを再起動しておきましょう。
開発ツール類インストール
$ dnf -y groupinstall "Development Tools"
$ dnf -y install openssl-devel readline-devel zlib-devel curl-devel git
nginxインストール
$ dnf -y install nginx

$ nginx -v
nginx version: nginx/1.20.1
ユーザー作成
$ useradd -r -m -d /opt/redmine redmine
$ usermod -aG redmine nginx
MySQL8
インストール
$ dnf -y install https://dev.mysql.com/get/mysql80-community-release-el9-1.noarch.rpm
$ dnf -y install mysql-community-server mysql-community-devel mysql-community-client
今回インストールされたのは、8.0.32でした。
初期設定
$ systemctl start mysqld
$ systemctl enable mysqld

$ grep password /var/log/mysqld.log
→パスワードをメモっておく

$ mysql_secure_installation

↓表示を省略してます
------
Enter password for user root: // メモしたパスワードを入力
New password:                 // 新しいroot用のパスワードを入力
Re-enter new password:        // 新しいroot用のパスワードを入力
Change the password for root ? ((Press y|Y for Yes, any other key for No) : n
Remove anonymous users? (Press y|Y for Yes, any other key for No) : y
Disallow root login remotely? (Press y|Y for Yes, any other key for No) : y
Remove test database and access to it? (Press y|Y for Yes, any other key for No) : y
Reload privilege tables now? (Press y|Y for Yes, any other key for No) : y
------
DB作成
$ mysql -uroot -p

mysql> CREATE DATABASE redmine CHARACTER SET utf8mb4;
mysql> CREATE USER 'redmine'@'localhost' IDENTIFIED BY 'パスワード';
mysql> GRANT ALL PRIVILEGES ON redmine.* TO 'redmine'@'localhost';
mysql> exit;
Redmineインストール
$ git clone -b 5.0-stable https://github.com/redmine/redmine.git /var/lib/redmine-5.0
$ chown -R redmine:redmine /var/lib/redmine-5.0
$ ln -s /var/lib/redmine-5.0 /var/lib/redmine

$ cp -i /var/lib/redmine/config/database.yml.example /var/lib/redmine/config/database.yml
$ vi /var/lib/redmine/config/database.yml

-------
production:
  adapter: mysql2
  database: redmine
  host: localhost
  username: redmine
  password: "パスワード"
  # Use "utf8" instead of "utfmb4" for MySQL prior to 5.7.7
  encoding: utf8mb4
-------
→コレ以外の設定(「development」や「test」)は削除
パスワードはDB作成の時に設定したパスワードを入力してください。
Ruby
インストール
$ dnf module list ruby

-------
AlmaLinux 9 - AppStream
Name                    Stream                    Profiles                     Summary
ruby                    3.1                       common [d]                   An interpreter of object-oriented scripting language
-------

$ dnf -y module install ruby/common
$ dnf -y install ruby-devel rubygem-bundler
モジュールインストール
$ cd /var/lib/redmine/
$ bundle install --path vendor/bundler --without development test
初期作業
暗号化のためのシークレットトークン生成とDBスキーマ生成を行う
$ cd /var/lib/redmine/
$ bundle exec rails generate_secret_token
$ bundle exec rails db:migrate RAILS_ENV=production
Unicorn
インストール
$ vi /var/lib/redmine/Gemfile.local
-------
gem "unicorn"
-------

$ cd /var/lib/redmine/
$ bundle update
設定(unicorn.rb)
$ vi /var/lib/redmine/config/unicorn.rb設定ファイルを作成します。ファイルの中身を別途記載します。
# unicorn.rb
worker_processes 2
listen "/var/run/unicorn/unicorn.sock", :backlog => 32
listen 8282, :tcp_nopush => true
timeout 30
pid "tmp/pids/unicorn.pid"
stderr_path 'log/unicorn.stderr.log'
stdout_path 'log/unicorn.stdout.log'
preload_app true
check_client_connection false

before_fork do |server, worker|
  defined?(ActiveRecord::Base) and
    ActiveRecord::Base.connection.disconnect!
  old_pid = "#{server.config[:pid]}.oldbin"
  if old_pid != server.pid
    begin
      sig = (worker.nr + 1) >= server.worker_processes ? :QUIT : :TTOU
      Process.kill(sig, File.read(old_pid).to_i)
    rescue Errno::ENOENT, Errno::ESRCH
    end
  end
end

after_fork do |server, worker|
  defined?(ActiveRecord::Base) and ActiveRecord::Base.establish_connection
end
サービス化
$ vi /usr/lib/systemd/system/unicorn.serviceunicornをサービス化します。
[Unit]
Description=Redmine Unicorn Server
After=mysqld.service

[Service]
User=redmine
Group=redmine
WorkingDirectory=/var/lib/redmine
Environment=RAILS_ENV=production
SyslogIdentifier=redmine-unicorn
PIDFile=/var/lib/redmine/tmp/pids/unicorn.pid
PermissionsStartOnly=true
ExecStartPre=/usr/bin/install -m 755 -o redmine -g redmine -d /var/run/unicorn
ExecStart=/usr/bin/bundle exec "unicorn_rails -c config/unicorn.rb -E production"
ExecStop=/usr/bin/kill -QUIT $MAINPID
ExecReload=/usr/bin/kill -USR2 $MAINPID

[Install]
WantedBy=multi-user.target
起動
$ systemctl start unicorn
$ systemctl enable unicorn
nginx設定
SSL証明書発行
先にletsencryptで証明書を発行してしまいます。IPアドレスのまま試したい方は、ここはスルーしてください。
$ dnf -y install epel-release
$ dnf -y install certbot
$ certbot certonly --standalone -d redmine.hogehoge.com
設定ファイル作成
$ vi /etc/nginx/conf.d/redmine.confnginx用の設定を作成します。
upstream unicorn {
    server unix:/var/run/unicorn/unicorn.sock;
}

server {
    listen 80;
    server_name redmine.hogehoge.com;
    return 301 https://redmine.hogehoge.com$request_uri;
}

server {
    listen 443 ssl http2;
    server_name redmine.hogehoge.com;
    root /var/lib/redmine/public;
    client_max_body_size 128M;

    ssl_certificate      /etc/letsencrypt/live/redmine.hogehoge.com/fullchain.pem;
    ssl_certificate_key  /etc/letsencrypt/live/redmine.hogehoge.com/privkey.pem;
    ssl_session_cache shared:SSL:1m;
    ssl_session_timeout 10m;
    ssl_protocols TLSv1.2 TLSv1.3;
    ssl_ciphers 'ECDHE-ECDSA-AES128-GCM-SHA256:ECDHE-RSA-AES128-GCM-SHA256:ECDHE-ECDSA-AES256-GCM-SHA384:ECDHE-RSA-AES256-GCM-SHA384:ECDHE-ECDSA-CHACHA20-POLY1305:ECDHE-RSA-CHACHA20-POLY1305:DHE-RSA-AES128-GCM-SHA256:DHE-RSA-AES256-GCM-SHA384';
    ssl_prefer_server_ciphers   on;

    location / {
        try_files $uri/index.html $uri.html $uri @app;
    }

    location @app {
        proxy_redirect off;
        proxy_set_header X-Real-IP $remote_addr;
        proxy_set_header X-Forwarded-For $proxy_add_x_forwarded_for;
        proxy_set_header Host $http_host;
        proxy_connect_timeout 60;
        proxy_read_timeout 60;
        proxy_send_timeout 600;
        proxy_pass http://unicorn;
    }

    error_page 500 502 503 504 /500.html;
}
設定ファイルの確認
$ nginx -t
-------
nginx: the configuration file /etc/nginx/nginx.conf syntax is ok
nginx: configuration file /etc/nginx/nginx.conf test is successful
-------
起動
$ systemctl start nginx
$ systemctl enable nginx
アプリ確認
ブラウザからアクセスしてみましょう
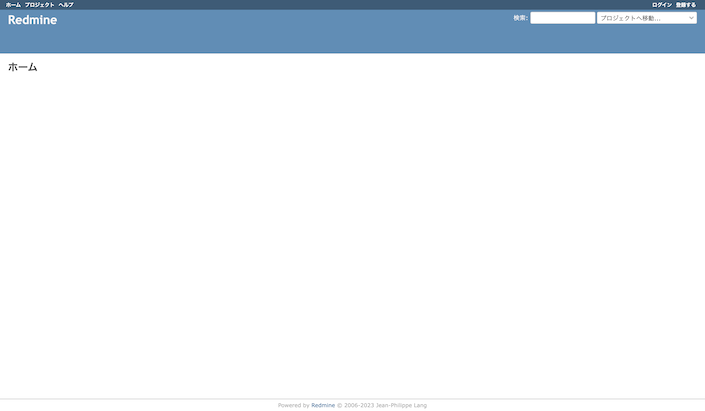
来たー!
最初は「admin」ユーザーでログインするところから始まります。パスワードは「admin」。
まとめ
メモリが少ない環境で作業する場合は、swapfileを積んでおくとbundleコマンドで停滞したりすることがなくなります。
良いRedmineライフを♪